Usage
This section outlines the specifics of using ezcv. It is recommended to have already read the quick start before coming here.
File structure
When you run the command a new folder will be created with your name, and some starter files like this:
Legend
| Icon | Meaning |
|---|---|
| 📁 | File Folder |
| 📷 | Image file |
| 📝 | File you should edit/delete |
| 📄 | File you don't need to edit/shouldn't delete |
📁<name>/
├── 📁.github/
│   └── 📁workflows/
│       └── 📄ezcv-publish.yml
├── 📁content/
│   ├── 📁education/
│   |   ├── 📝example-current.md
│   |   └── 📝example-old.md
│   ├── 📁projects/
│   |   └── 📝example.md
│   ├── 📁volunteering_experience/
│   |   ├── 📝example-current.md
│   |   └── 📝example-old.md
│   └── 📁volunteering_experience/
│       ├── 📝example-current.md
│       └── 📝example-old.md
├── 📁images/
│   ├── 📷 abstract-landscape.jpg
│   └── 📷 ice-caps.jpg
├── 📄.gitignore
└── 📝config.yml
From here you can go into your config.yml file and pick a theme, then start filling out your content according to what's available for the theme.
To preview your content use:
ezcv -p
Note that your browser Cache may cause some issues when switching themes, please hard refresh (usually ctrl + r) Additionally DO NOT proxy the port for this preview, it is not designed to be a production-ready http server
If you're on github then pushing the contents to master/main will activate the publish workflow and automatically publish the site to <username>.github.io.
Configuration Settings
Each site will have a config.yml file, this file is in the YAML format and defines settings for configuring your site. Below are the list of all of the first-party supported fields.
See config example for an example file.
| Field name | description | options |
|---|---|---|
| name | The name of who's site this is | Any name |
| background | Path to an image if the theme uses a background image | A path or url to an image file |
| avatar | Path to an image of the person who's site it is | A path or url to an image file |
| The email of who's site this is | Any valid email (i.e. example@example.com) | |
| phone | The phone number of who's site this is | Any valid phone number (i.e. 123-134-1324) |
| biography | A biography of who's site this is | Any text (use | or > to span multiple lines see config example below for details) |
| role | The role/job title of who's site this is | Any text (i.e. CEO) |
| company | The company of employment for who's site this is | Any text (i.e. Google) |
| address | Your physical address | The full text of your address |
| social | Social media links | github, twitch, youtube, instagram, twitter, snapchat, linkedin, facebook |
| examples | Whether to include content files that have "example" at the start of the filename | true or false |
| theme | The name of the theme to use, you can also use a URL to a zip folder | the name of any included theme i.e. dimension |
| ua_code | The UA code provided to you by Google Analytics | Any code in the format UA-000000-0 (the 0's can be any number) |
| resume | Whether or not to generate the resume page | Either true or false (false by default) |
| ignore_exif_data | Whether to use exif data for gallery images | Either true or false (false by default) |
* This guide can help you setup a UA code
Configuration File Example
Here is an example config.yml file with every field (they can be in any order):
name: Your Name
background: background.png # An image to use as a background for the site
avatar: avatar.png # The avatar/profile picture of the person's site
email: email@example.com
phone: 123-123-1234
biography: | # Used to allow the description to go across multiple lines
  A vivid and succinct description of yourself.
  This biography is so important it spans multiple lines.
role: Your job role/title (i.e. CEO)
company: Company name
address: 123 first street SE
social:
  github: descent098 # Your username on github
  twitch: username # Your username on twitch (everything after https://twitch.tv) i.e. https://twitch.tv/canadiancoding would be canadiancoding
  youtube: /channel/channel-ID or custom_url # Your custom url (i.e. https://youtube.com/mkbhd would be just mkbhd) or see this guide to find your channel ID: https://support.google.com/youtube/answer/3250431?hl=en
  instagram: username # Your username
  twitter: handle # Your handle (without the @)
  snapchat: username # Username others use to add you
  linkedin: name # go to linkedin and go to your profile, your name will be at the end of the url i.e. www.linkedin.com/in/<name>
  facebook: your id # go to facebook and go to your profile, your ID will be at the end of the url i.e. www.facebook.com/<your id>
  url: https://kieranwood.ca # The URL the site will be hosted on (used by resume)
examples: true # If you want to include the example.md files in your final build (good for developing new themes)
theme: dimension # Which of the included themes to use
ua_code: UA-000000-0 # The UA code for google analytics
resume: true # Whether to generate the resume page or not
ignore_exif_data : false # Whether to use exif data for gallery images
Creating Markdown Content
If you have never worked with markdown before it's a good idea to get familiar with the syntax of markdown files. If you are familiar it is still good to take a look at the list of markdown extensions that have been added since they change some of the default markdown behaviour with lists and tables as well. To create a markdown file you just create any file with a .md extension.
Remote editing
If you are editing without your own environment setup you can use github's built in editor (which will just let you edit in plaintext), or stackedit (which will let you edit in plaintext and see a preview on the right). If you don't like either you can also write the file localy and then upload it to the folder you want to add it to (see drag-n-drop upload for details).
Steps
- Regardless of which you use you will need to first create the file. Go to the repository for your website and head into the folder for the section you want to create the content in (i.e.
/content/education) and then hitCreate new file: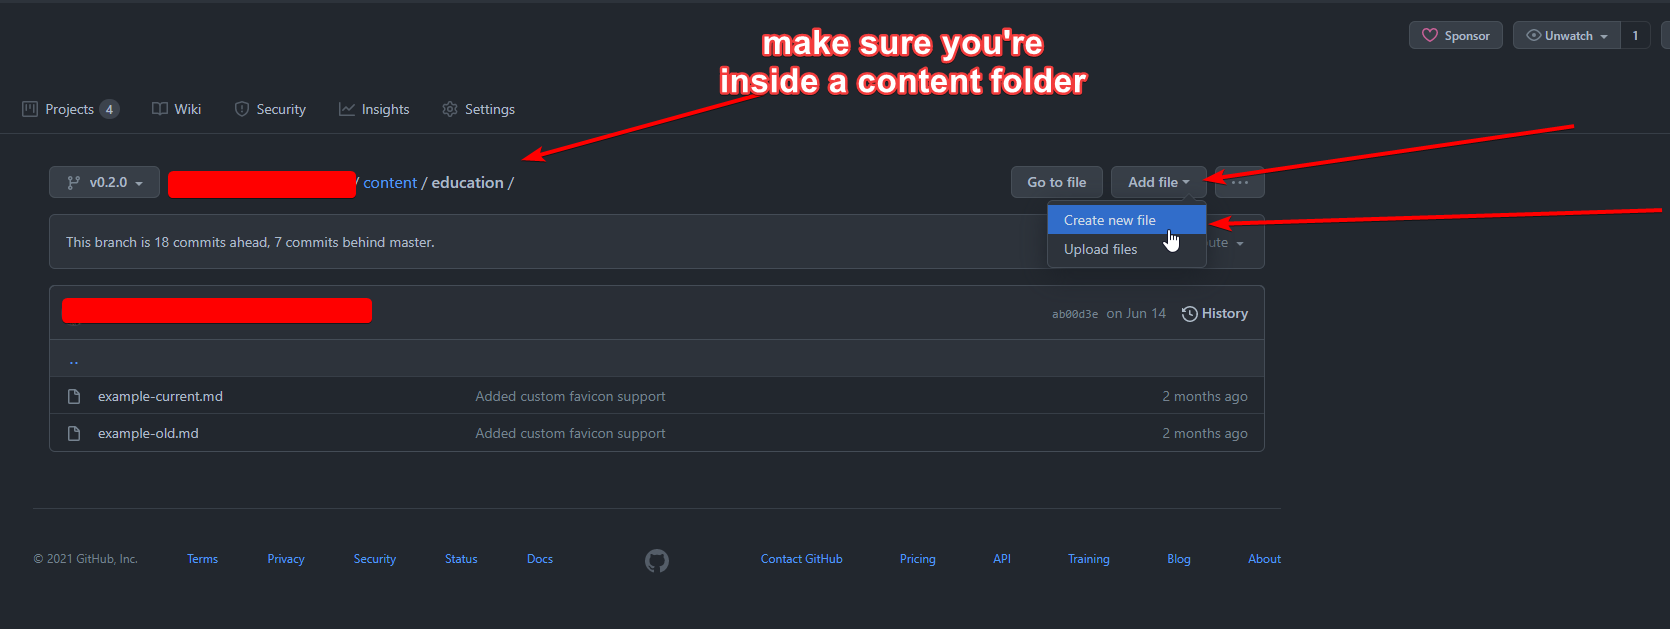
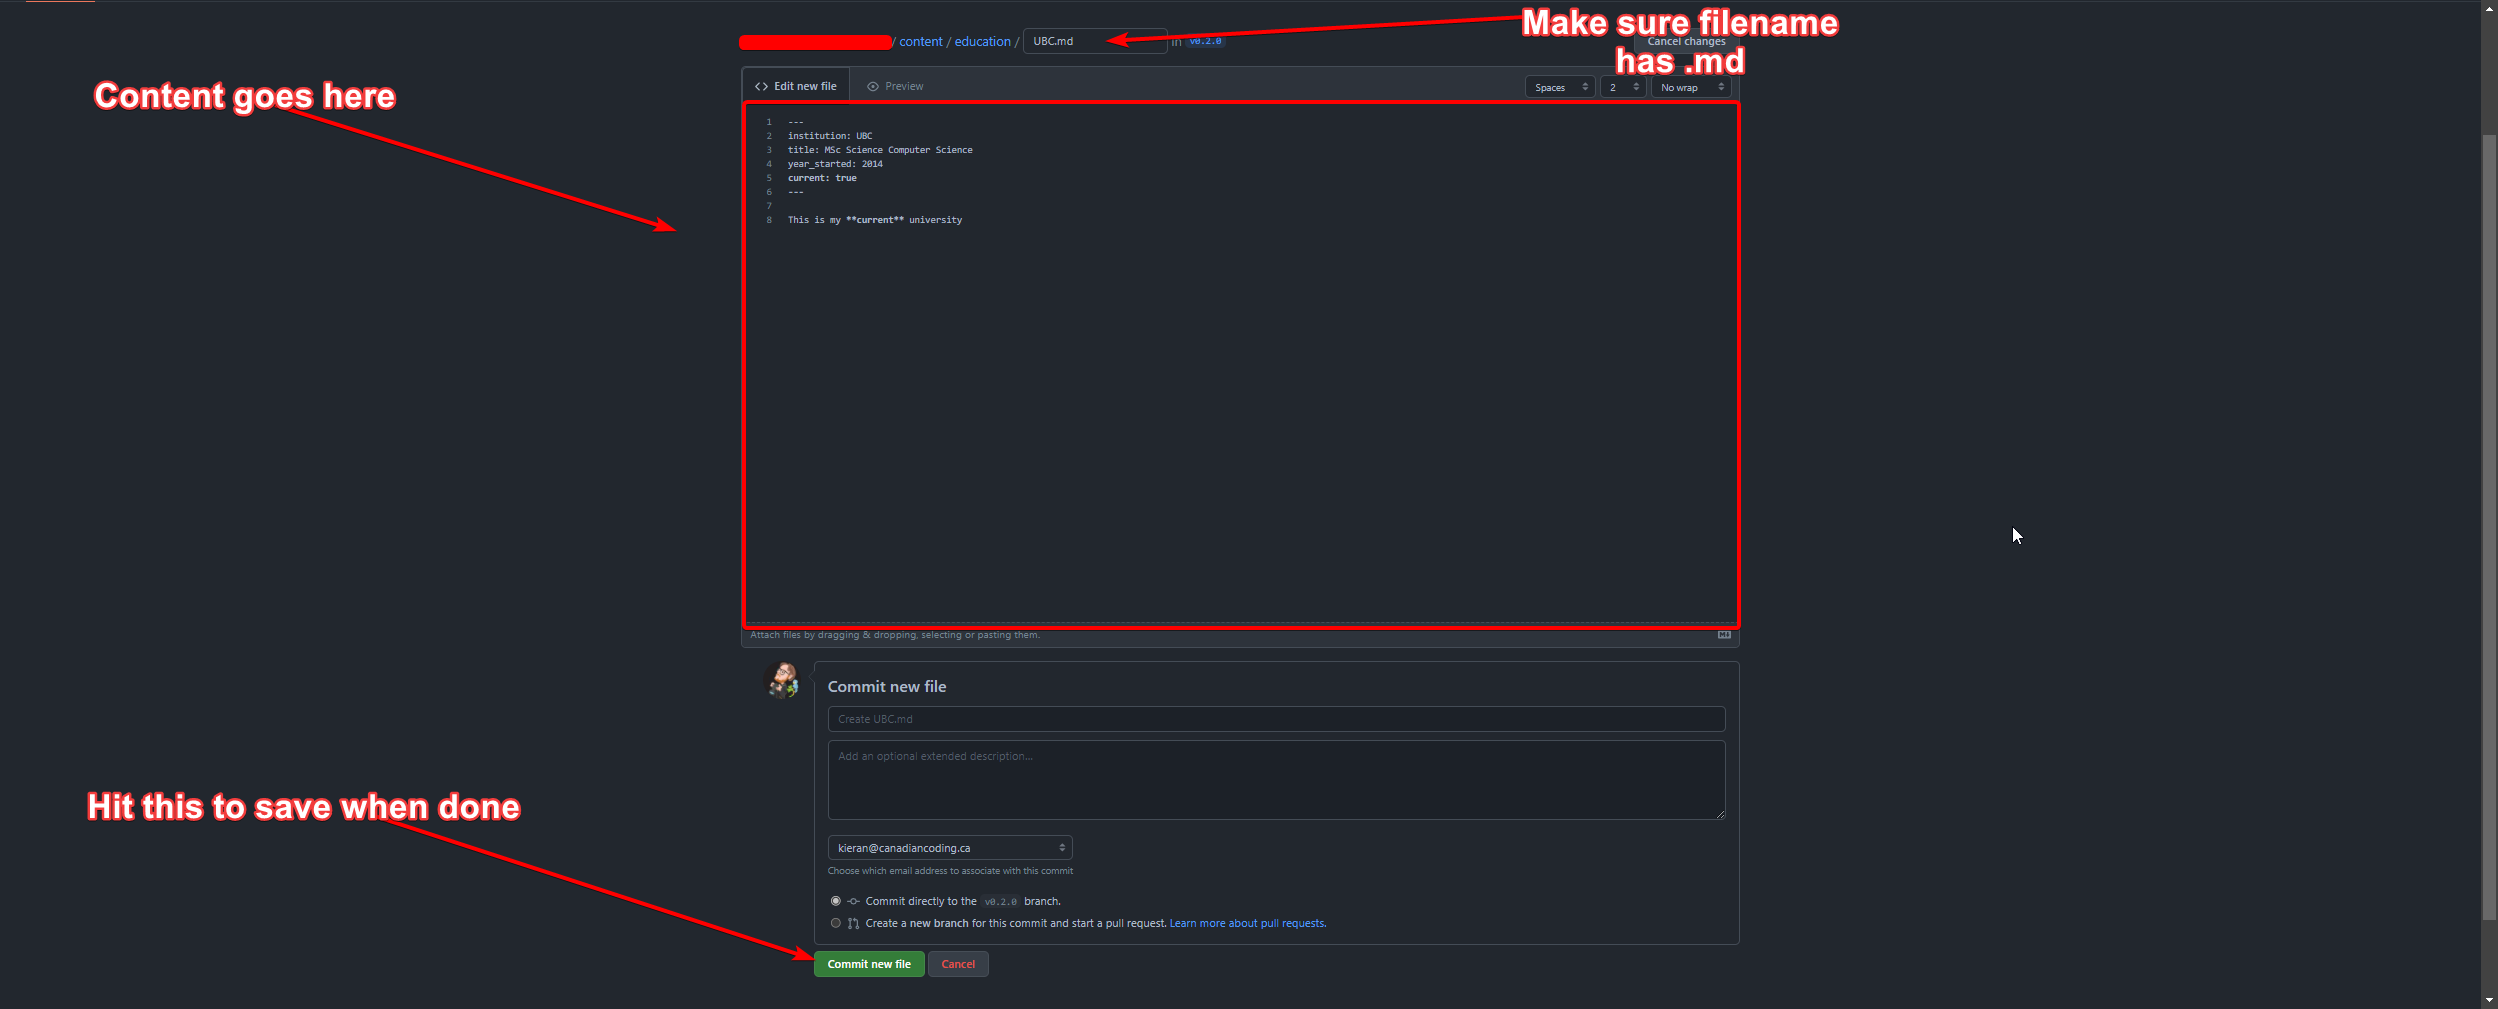
- If you are using stackedit then write the content out in stackedit, then copy it into the github content area. If you are using github, just write it directly in the content area:
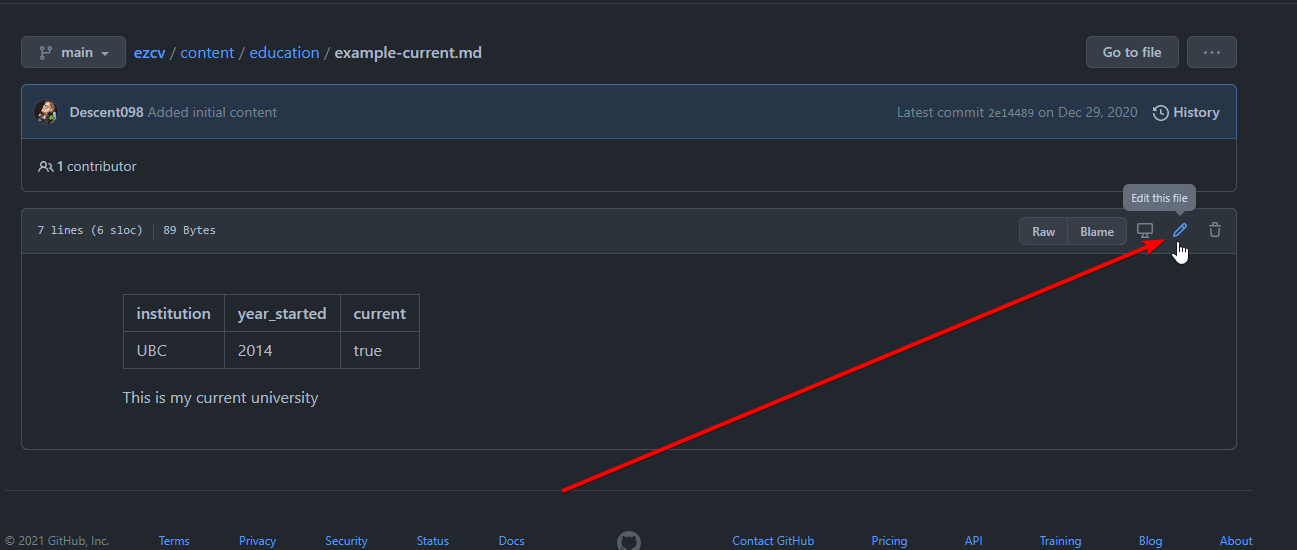
- You can edit content by going back into the same folder, finding the file and hitting the pencil, then hitting commit changes when done:
Local editing
For local editing the minimum you will need is some plain text editor like notepad, or textEdit. Alternatively there are extensions you can put on existing IDE/text editors such as the included VSCode support or Atom markdown Writter Extension. For the most intuitive use (if you don't write markdown much) then you can use a dedicated editor that operates more like a typical document editor like Typora (You will have to enable math in order to use it in typora).
Once you have picked your editor you have 2 options for uploading your created markdown files:
- Drag-n-drop; which requires nothing else be installed on your PC, and doesn't even require your other site files to be on your PC
- Git; which needs you to have your site setup locally with git (details in quick start)
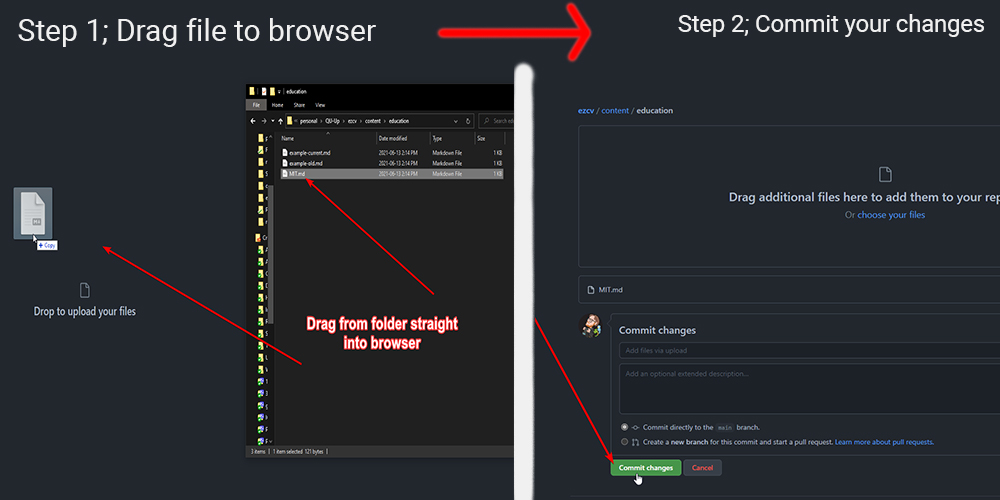
Drag-n-Drop upload
This assumes you followed the remote editing setup
Steps
- Create your content anywhere on your PC (just make sure it is a
.mdfile) - Go to your template repo (on github where your site files are), and go into the content folder you want to create content for (i.e.
/content/education)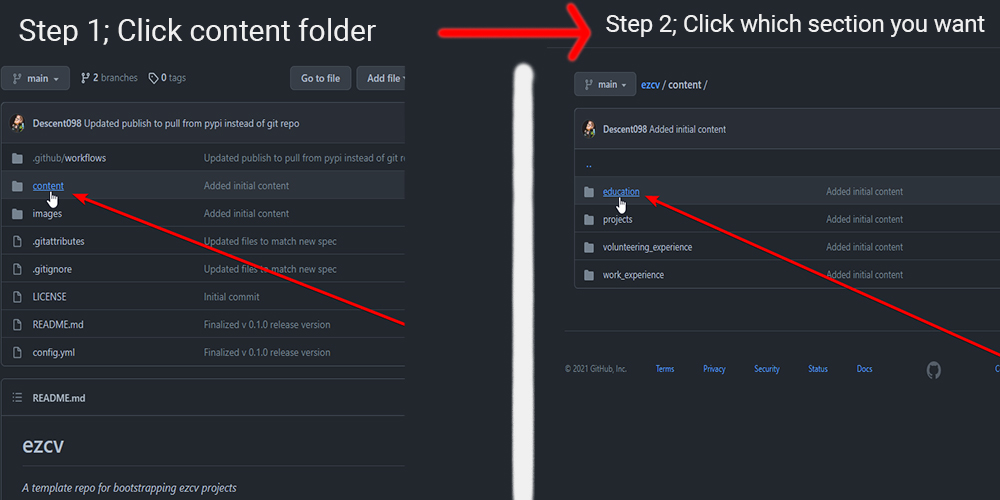
- Drag your markdown file anywhere, and then scroll down and hit commit:
- You can also drag a file with the same name following steps 2-3 to make changes, or alternatively you can use the built in github editing tool by hitting the pencil icon:
Git
All of the following steps will take place in whatever folder you have the rest of your site files in.
Steps
- Create your markdown files directly inside the content folder that you want to create content for using the
.mdextension (i.e./content/education/MIT.md). You can preview usingezcv -pinside your site folder (remember to save first). - Add your files
git add . - Commit your changes with a message
git commit -m "Added a file called MIT.md to education section" - Push your changes when you are ready to go live
git push - To edit your files or delete them, make the edits or remove the files and follow steps 2-4 again
Included extensions
On top of standard markdown there are a number of extensions that have been added to make creating content easier, they are detailed below with examples of how to use them. All first party themes support all of these extensions, but third party themes may not support some of them. Keep in mind that the "Dimension" theme is used in the screenshots to show off all these features.
Footnotes
Footnotes are useful for adding sources, and other details that may be cumbersome inline. The built in footnotes system also creates easily clickable links to go directly to footnotes, and back from footnotes to inline references. To use them you would have the syntax:
February has 28 days[^1].

... Rest of your content

[^1]: Information collected from my calendar
The 1 in this case is not significant, the only thing that matters is that the inline reference has a corresponding footnote at the end of the document. You could also use:
Letters for footnotes[^a], or phrases [^wow], or even symbols [^+]. You can also use a footnote multiple times [^a]


[^a]: This is a great footnote
[^wow]: Owen willson
[^+]: I don't know why you would want to though
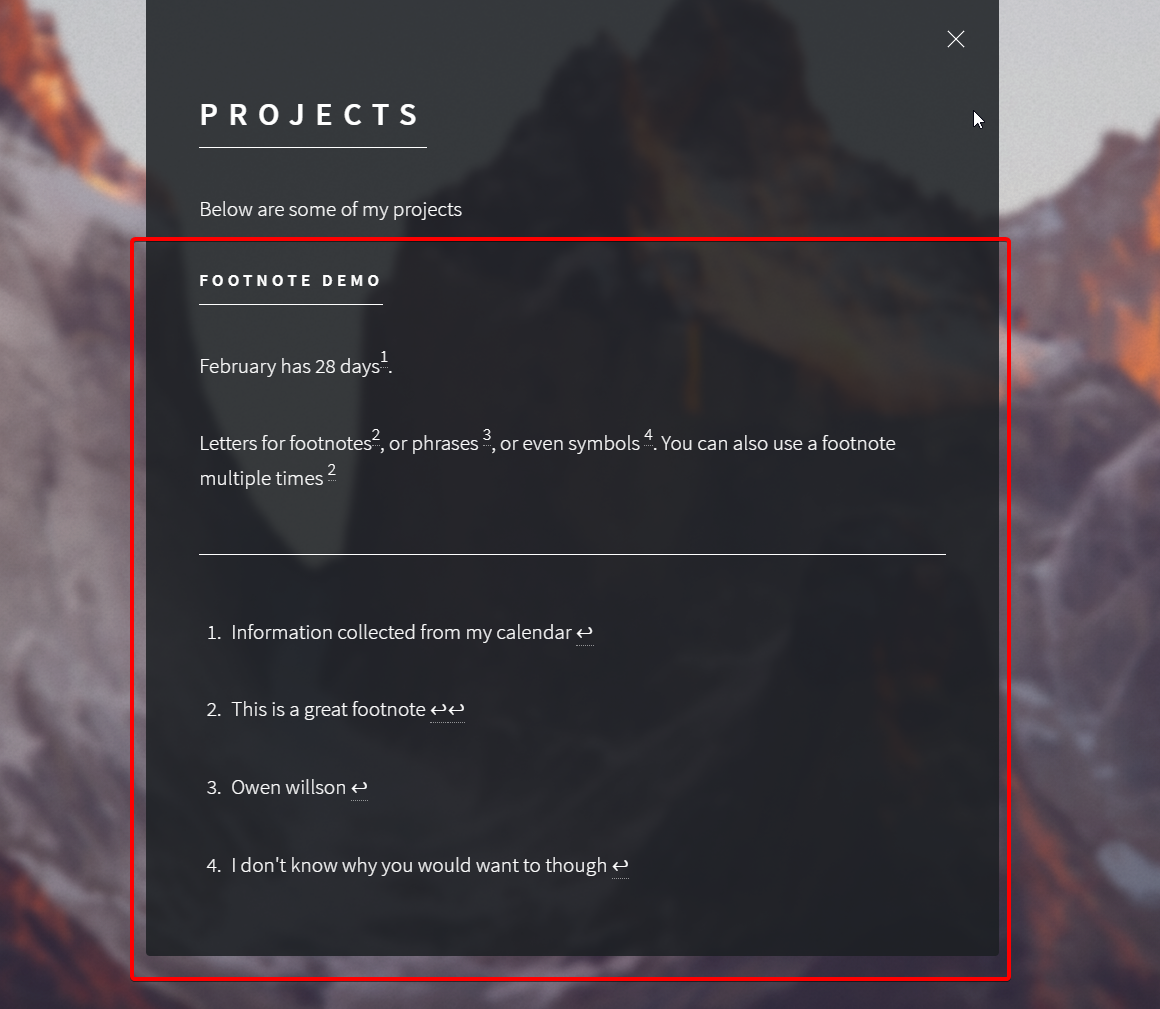
Putting this all together a file like this:
---
title: Footnote Demo
---

February has 28 days[^1].

Letters for footnotes[^a], or phrases [^wow], or even symbols [^+]. You can also use a footnote multiple times [^a]


[^1]: Information collected from my calendar
[^a]: This is a great footnote
[^wow]: Owen willson
[^+]: I don't know why you would want to though
Results in:
Tables
This is technically part of regular markdown, but there are several options given in the official markdown spec so I wanted to give the tested one here:
First Header  | Second Header
------------- | -------------
Content Cell  | Content Cell
Content Cell  | Content Cell
Produces:

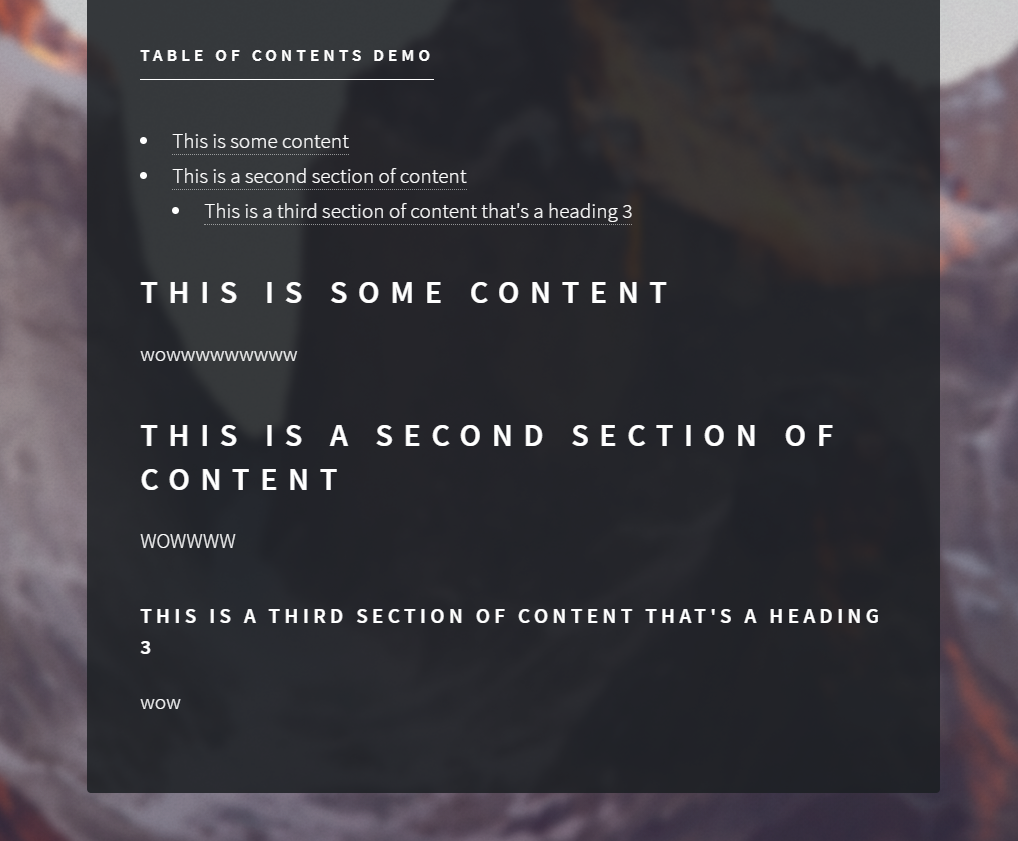
Table of contents
A table of contents is useful for longer content. The built in system uses the headings and heading levels to create a list of clickable links to give people an overview of what's inside that content.
To set it up simply add [TOC] wherever you want the table of contents to appear. So for example this content:
---
title: Table of contents Demo
---

[TOC]

# This is some content

wowwwwwwwww

## This is a second section of content

WOWWWW

### This is a third section of content that's a heading 3

wow
Would produce:
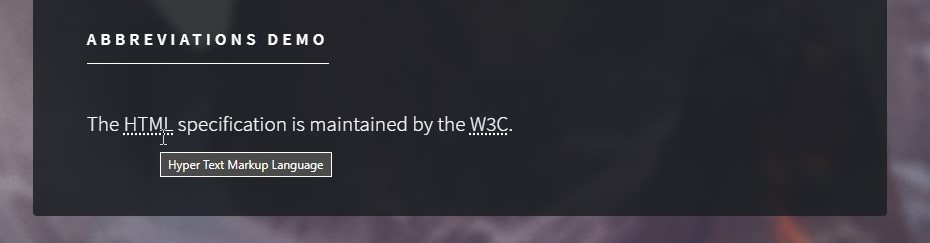
Abreviations (abbr)
This extension allows you to specify the full form of an abbreviation once and provide hover-text tooltips to explain the abbreviation for people.
So for example this content:
---
title: Abbreviations Demo
---

The HTML specification
is maintained by the W3C.

*[HTML]: Hyper Text Markup Language
*[W3C]:  World Wide Web Consortium
Would produce:
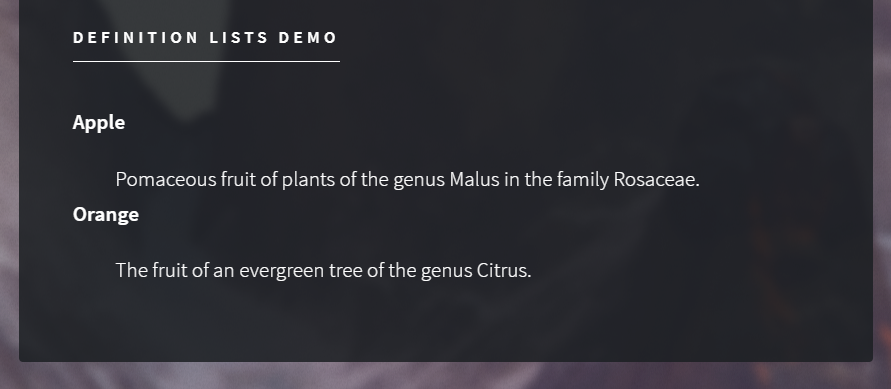
Definition lists (def lists)
The syntax provided allows for definitions to use the HTML specified dl, dt, and dd tags for definitions. Though aesthetically the same look can be achieved much more simply in other ways the primary advantage to using this is that your page will be more accessible for screen readers for the visually impaired along with certain API's and page scrapers treating definitions more specifically.
For example content such as:
---
title: Definition lists Demo
---

Apple
:   Pomaceous fruit of plants of the genus Malus in
    the family Rosaceae.

Orange
:   The fruit of an evergreen tree of the genus Citrus.
Would produce:
Sane lists
This mostly just changes a specific edge case for markdown that is handled in a weird way. If you had two lists where one is a numbered list, and one is just bullets right after each other such as:
1. Ordered item 1
2. Ordered item 2

* Unordered item 1
* Unordered item 2
In standard markdown it would be the same as writing:
1. Ordered item 1
2. Ordered item 2
3. Unordered item 1
4. Unordered item 2
Whereas with sane lists they are considered seperate and stay as:
1. Ordered item 1
2. Ordered item 2

* Unordered item 1
* Unordered item 2
Sane lists just changes this behaviour to... well make it more sane, and consider this situation as an ordered list and a seperate bulleted list instead of just continuing the numbered list.
LaTex/MathJax/Formulas
This extension allows you to write LaTex/Mathjax/formulas inline using latex syntax and have them render using mathjax. To use this simply write a formula in latex with two \$ symbols around it.
For example:
$$a^2 + b^2 = c^2$$
This can be done inline as well, just keep in mind a force break will be added in the HTML, so:
# Pascals triangle

Now this one is a classic, and is the bane of hischoolers existence $$a^2 + b^2 = c^2$$ That's the stuff
Would render looking like you wrote:
# Pascals triangle

Now this one is a classic, and is the bane of hischoolers existence
$$a^2 + b^2 = c^2$$
That's the stuff
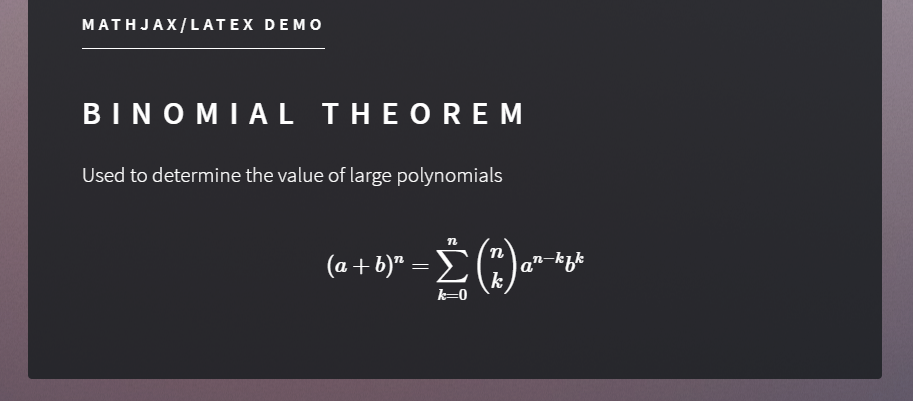
Putting this all together for more complex examples such as the binomial theorem, you could do:
---
title: Mathjax/LaTex Demo
---

## Binomial Theorem

Used to determine the value of large polynomials

$$
(a + b)^n = \sum_{k=0}^{n} \binom{n}{k} a^{n-k} b^k
$$
Would produce:
Keep in mind many latex packages are not available natively in MathJax, so depending on how niche your requirement is there may need to be some fiddling to get everything working. If you need extra packages installing, you will need to look at messing with the mathjax configuration in your theme. If you have questions about doing this please post in the discussions board.
Mermaid (graphs/diagrams)
Note this integration is HIGHLY LIMITED
Blog Content
Blog markdown sections differ from standard markdown sections in how they show up. Generally they have 3 peices of metadata you need
- Title: the title of the post
- Created: a datestring of the day (i.e. for april 26th 2022 it would be
2022-04-26) - Updated: a datestring of the day the post was last updated (i.e. for april 26th 2022 it would be
2022-04-26)
Sections
Sections is the name given to the content you use to fill your site. For example if you have content that lists your work experience, or education then that would be a section.
First Party sections
Here is the list of first party sections supported (check each theme to see which of these is supported):
- Projects: Various projects you have worked on in the past
- Education: Your education at various educational institutions
- Work Experience: Any current/old work experience that you want to include
- Volunteering Experience: Your current/old volunteer experience that you want to include
- Gallery: Images you want to showcase (usage details can be found here)
- Blog: Markdown files used for a blog-like content
In your site you simply put the content you want to create inside content/<section name>. For example to create a file about your education at MIT you would add a file called MIT.md inside content/education. Assuming you used the setup steps from the quick start this section should already be included. For each section there are included example files to let you know what fields are available (these won't be included in your export unless examples: true is set in your config.yml file).
Creating Files for sections
Every section except for galleries uses markdown and so details for creating content can be found here. For the image gallery specifically details can be found here.
Image Management
To include images in your site (except for in the gallery) add them to the images folder (in the same spot as your config.yml file see file structure for details).
From there, there's two possible ways to include images:
- In the metadata of a file, for example in
/content/projects/example.mdyou will see an image field. - Inline in a file, like if you wanted to include an image of a diagram in a piece of content.
To include an image in the metadata of a file, you just simply put the filename. For example if you have abstract-landscape.jpg inside the images folder then you would just do something like
---
image: abstract-landscape.jpg
---
<!--- This is where your other content would go -->
To include an image inline you use standard markdown syntax and reference the file using the full path i.e. images/abstract-landscape.jpg would be:
---
<!-- This is where your metadata is -->
---
This is a cool image:

Extra Features
Below is a description of several features that are built in, explained in higher detail.
Resume Generator
Built into the system is a resume generator. This generator used the built in sections (Work experience, Education, Volunteering Experience, and projects) along with the configuration file to generate a HTML resume.
To turn this feature on set:
resume:true
In your config.yml file (it is set to false by default).
Customizing Favicon
To upload a custom favicon simply create a file called in the images folder called favicon.png. Ideally you want an image that is around 150px x 150px and it must be a PNG file.
Image Gallery
To use the image gallery make sure you have a folder in your content folder called gallery. Inside you can include any of the following image formats:
- .jpg
- .png
- .jpeg
- .gif
- .svg
- .webp
- .apng
- .jfif
- .pjpeg
- .pjp
When using image files that support it you can also include Exif data(this is done automatically by the camera %90 of the time) that will be pulled by some themes to show off the camera settings used to take a photo.
If you do not want this information to show even on images that have Exif data you can add this to your config.yml file:
... # Other stuff
ignore_exif_data : true # Whether to ignore exif data for gallery images
... # Other stuff