Quick start
Everything you need to get you up and running with ezcv.
There are two different ways to get started:
- Local installation
- Remote editing
If you are familiar with git, github and markdown and want to keep your files on your local computer then I would recommend starting from Local Installation.
If you are unfamiliar with any of the above then see directly below for getting started with remote/no-code editing. Remote/no-code editing combined with drag-n-drop editing is typically the easiest method to create content.
If you have any questions be sure to check out our Q & A section of the discussion board.
Remote editing
Before you get started make sure you sign up for a GitHub account (note the name will be your URL if you don't want to purchase a domain name).
Here is a video walkthrough of the whole remote editing process:
Setup
Your colours may be different than the screenshots, I have a dark theme on and by default GitHub is light theme.
-
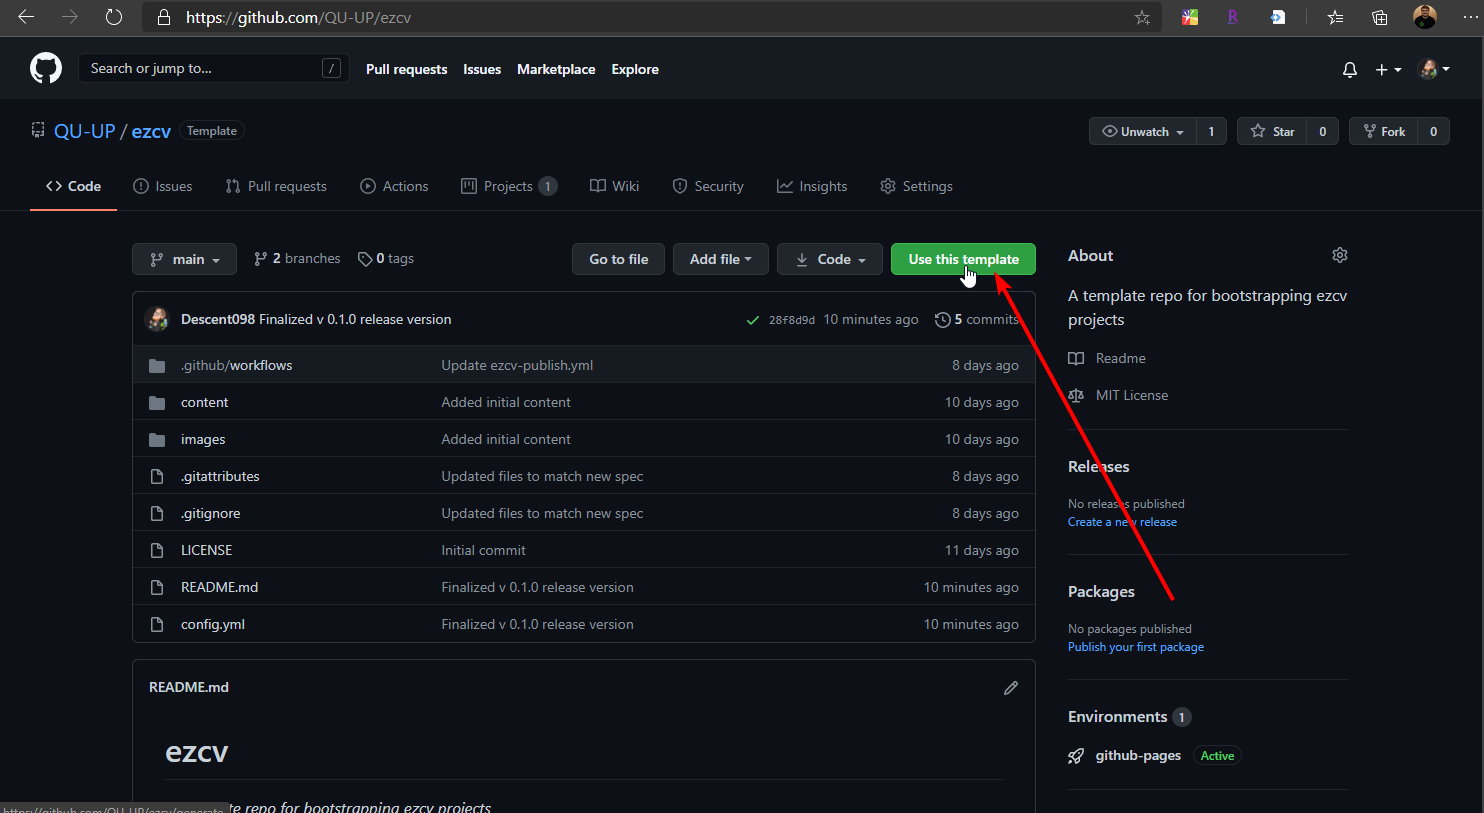
Go to the template repository and click "Use This Template" (while logged in):
-
Name the repository
<username>.github.io(replace<username>with your github username), and make sure you checkoff "Include All Branches". I would also recommend setting it to public so if you need help later you can show people your project. Then hit create repository from tempalte: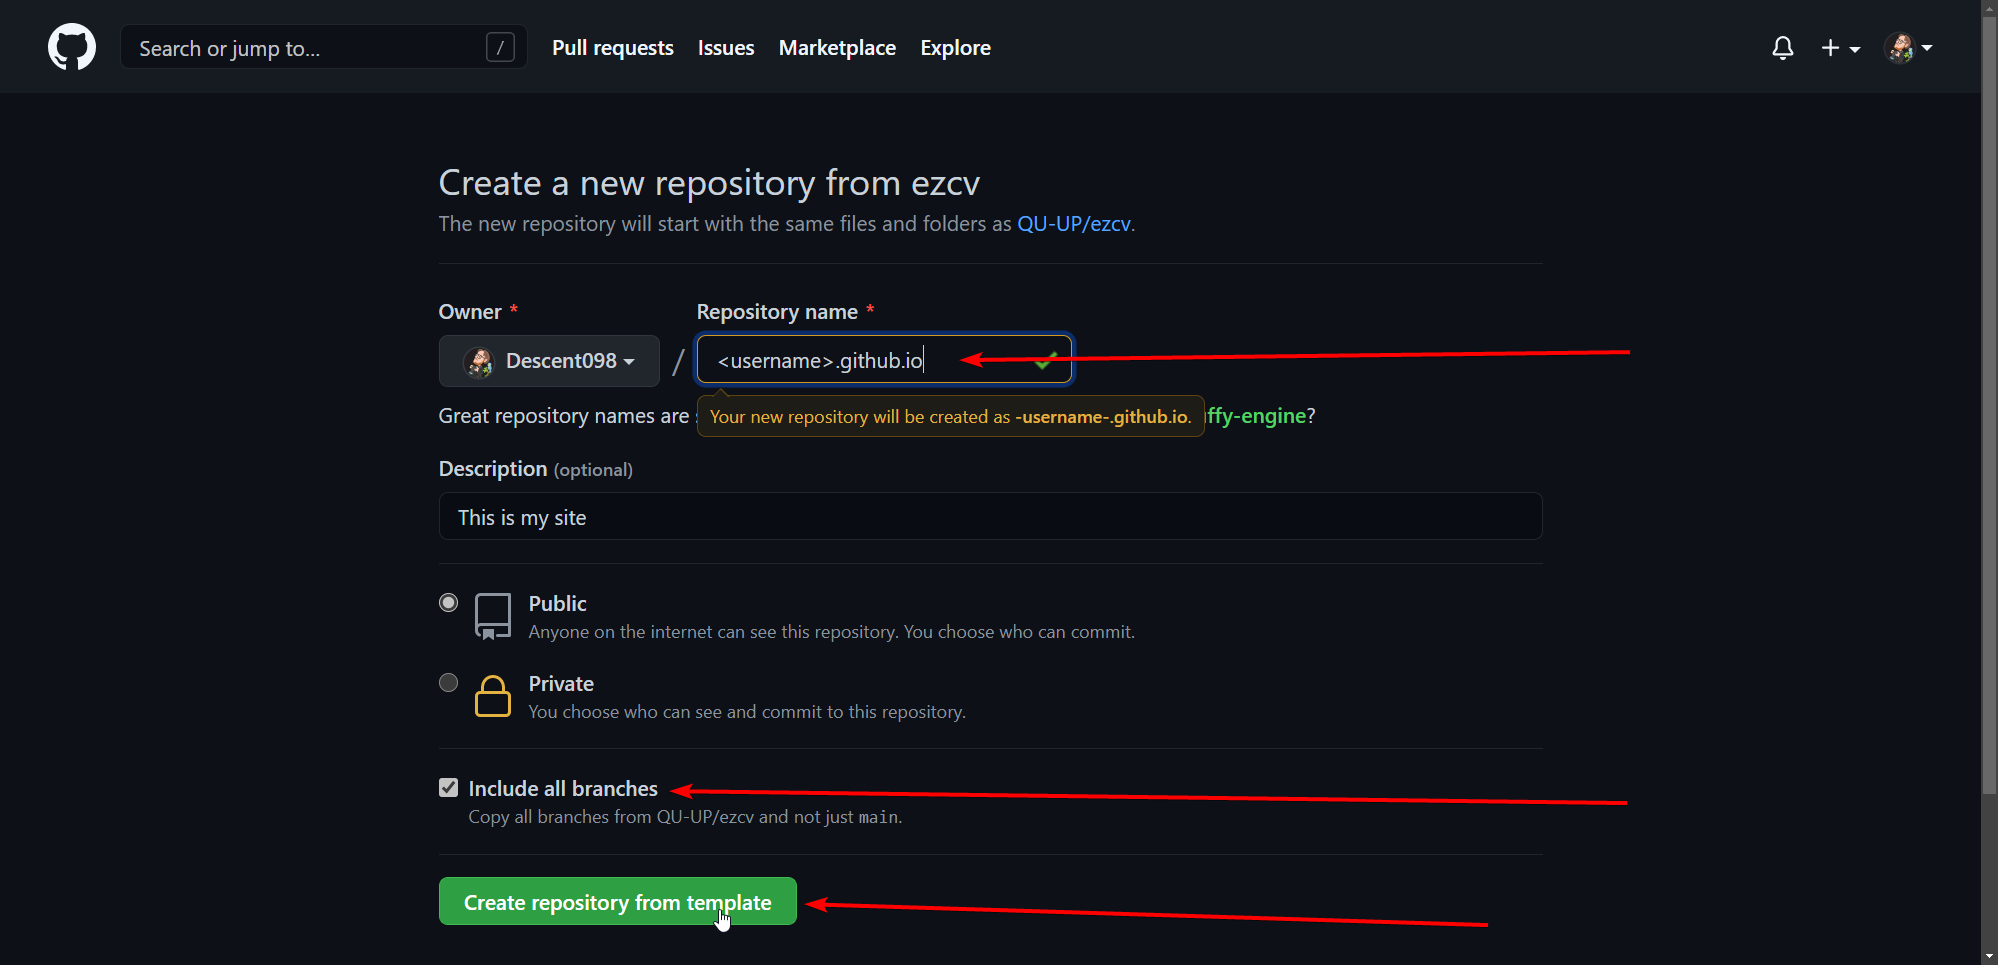
-
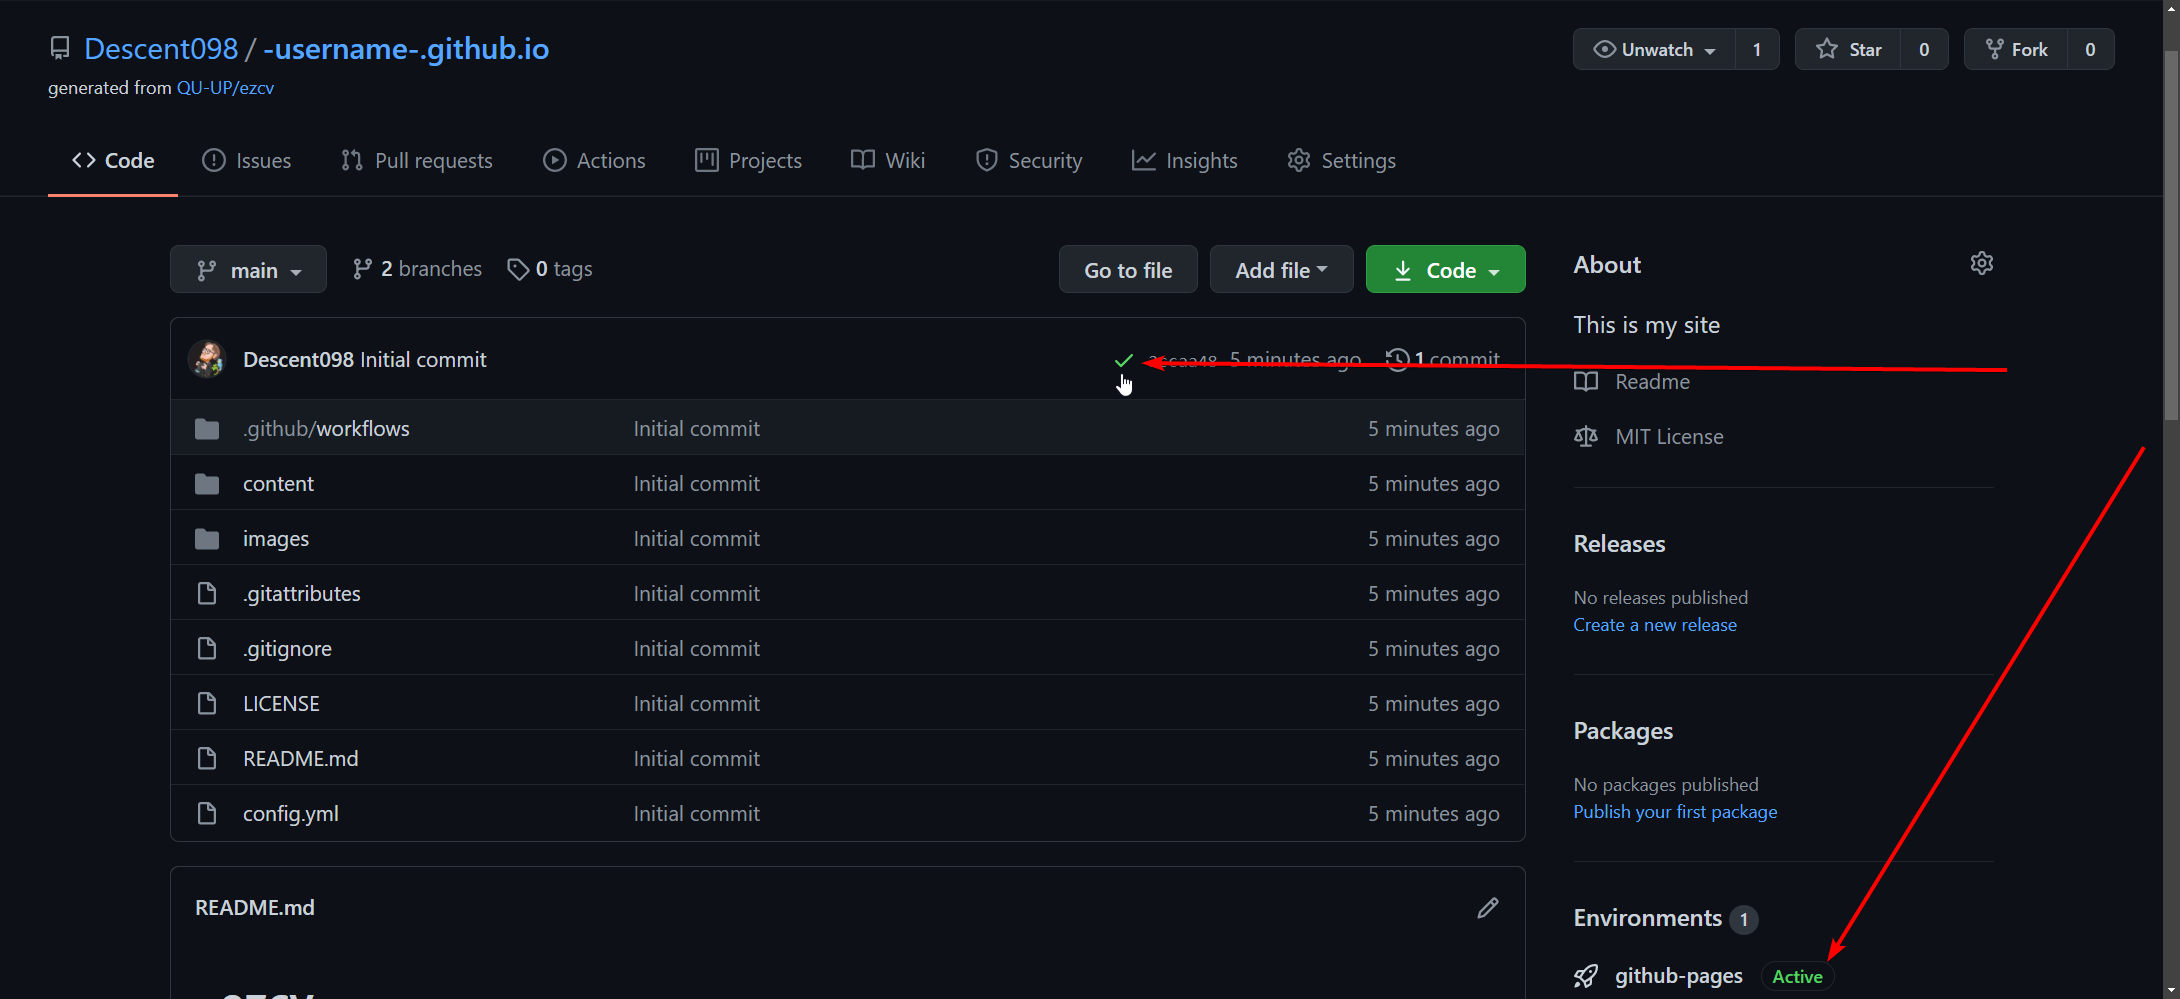
At this point there should be an orange circle in the indicated area. Once it turns to a green checkmark, and you see the active badge beside "github-pages" go to the next step (see image for reference):
-
Go to
<username>.github.io(replace<username>with your github username) in your browser, and you should see something like this: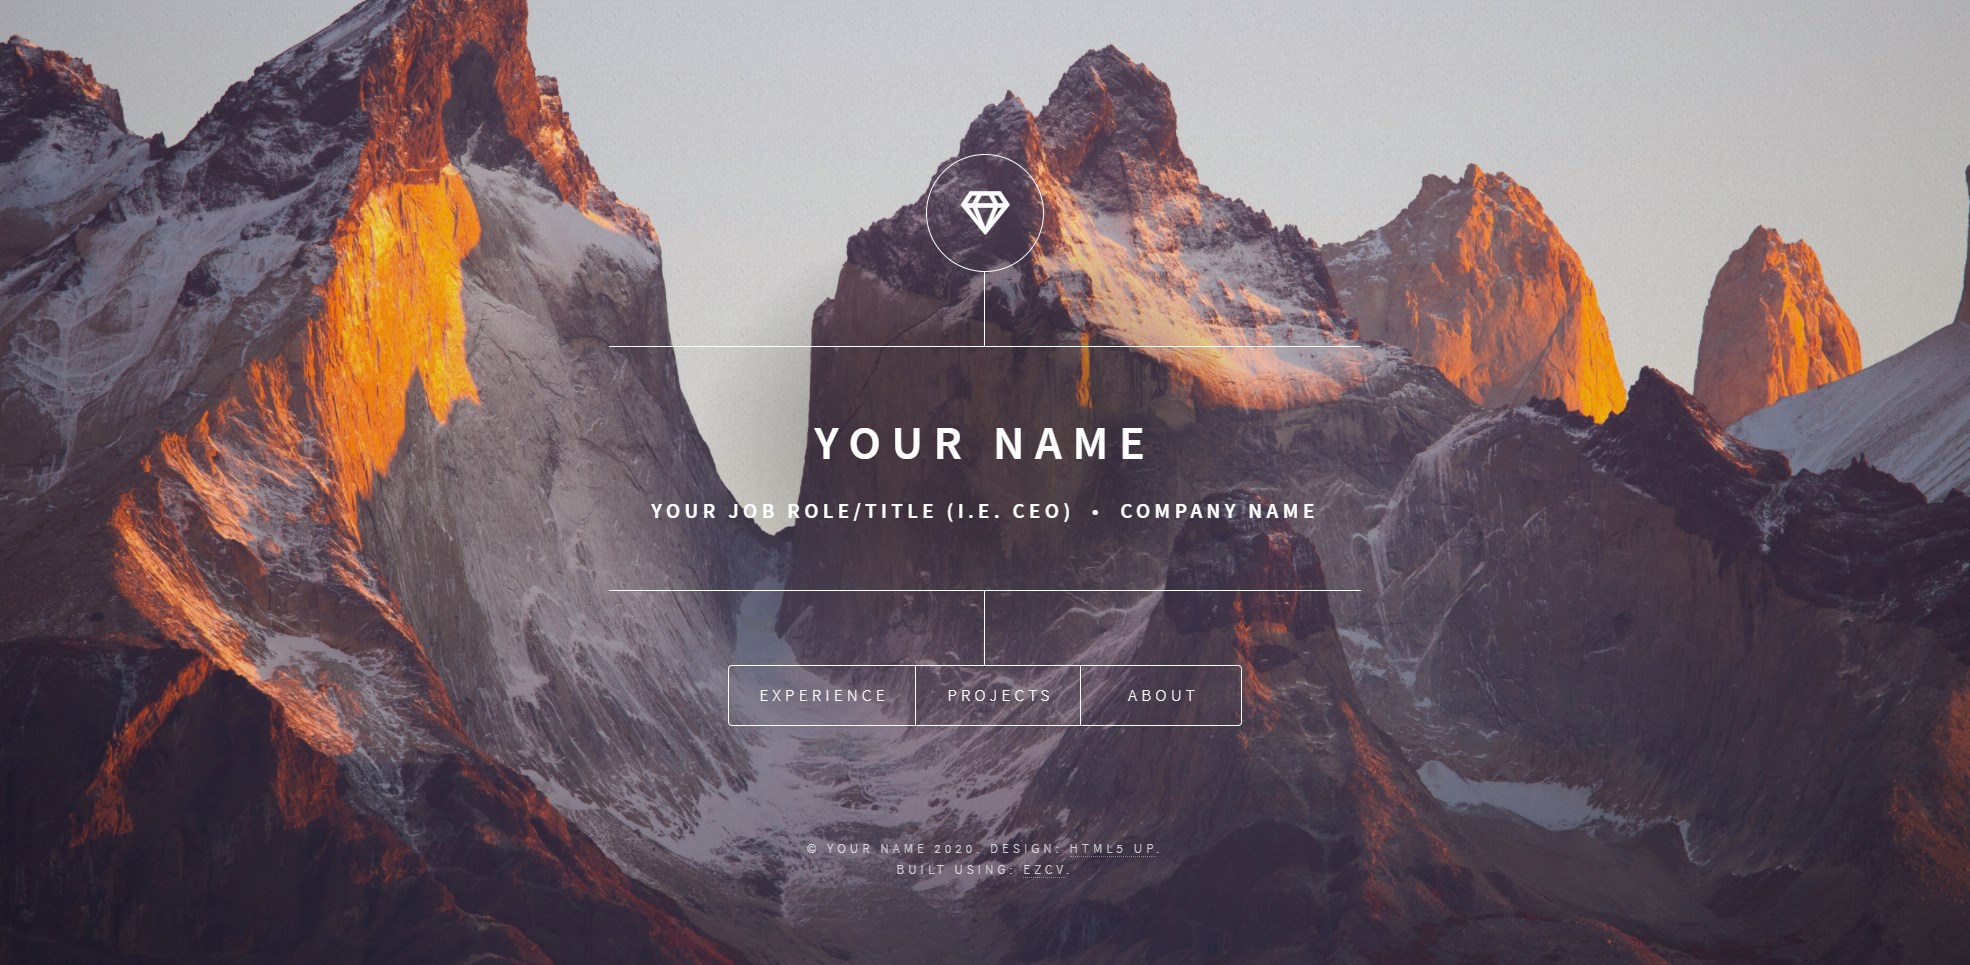
If you see something like the image in step 4 then everything went right. If not, make a comment on the discussion post and include the URL to your repo.
I will try to get back to you as soon as I can.
For any other issues/questions check out the discussion forum
Usage
From here check out the usage page which will help you learn how to create and edit your content.
Local Installation
To use ezcv you will need python 3.6+ (earlier versions wont work) and pip for python 3.
Installation
There are two options for installation, from PyPi or from source.
From PyPi
- Run
pip install ezcv
From source
- Clone this repo: https://github.com/Descent098/ezcv
- Run
pip install .orsudo pip3 install .in the root directory
Initialize Project
The easiest way to get started is by running:
ezcv init <name>
Replacing the <name> argument with your name (use "" if you want to use your full name i.e. ezcv init "Kieran Wood").
If you already know which of the included themes you want to use you can instead run:
ezcv init <name> <theme> (i.e. ezcv init "Kieran Wood" "paradigm_shift").
If you prefer you can also initialize using the github template repository which sets up a project with all of the fields filled in if you prefer that.
From here check out the usage page which will help you learn how to create and edit your content.
Also a quick tip, you can use ezcv -p to quickly preview your site before pushing it to git, so you don't need to make multiple commits seeing how things look.
Initialize with Flask
There is also the option to initialize a project using Flask as an http server. You can do this by adding a -f to the command above (ezcv init <name> <theme> -f).
You can also initialize it using the available Template repo for flask integration
For existing projects you can also add this flask integration by copying the code from here and putting it into a new file called routes.py then installing flask (pip install flask) and running python routes.py